Most video editing tools have a lot of options that the average user won't use. If you're looking for a way to just cut unwanted sections from videos, the open source application SimpleVideoCutter is an interesting choice.
Just download the latest version from the project's GitHub website and extract the archive to a directory of your choice.

The program's GUI consists of a menubar at the top, a side-panel to the left with editing tools, and a video preview pane. The small panel at the bottom of the video pane is the timeline graph that you can use to view frames. A status bar is visible on the bottom of the window that displays the volume level and file selection status.
SimpleVideoCutter requires FFmpeg (also open source) to be installed, for converting video files. I used the Windows 64-bit Static version. Once you have downloaded it, select the path to the FFmpeg.exe in the settings video of the video editor program.
Open a file that you want to edit to start the cutting process. SimpleVideoCutter supports the following video formats: MOV, AVI, MP4, WMV, RM and MPG. The video should begin playing in the video pane, and you can pause it anytime you want to by hitting space or using the mouse. The vertical line on the timeline bar indicates the current position of the playback. Mouse over the timeline to get a preview of the frame to pop-up, you can use this to decide the start and end positions.
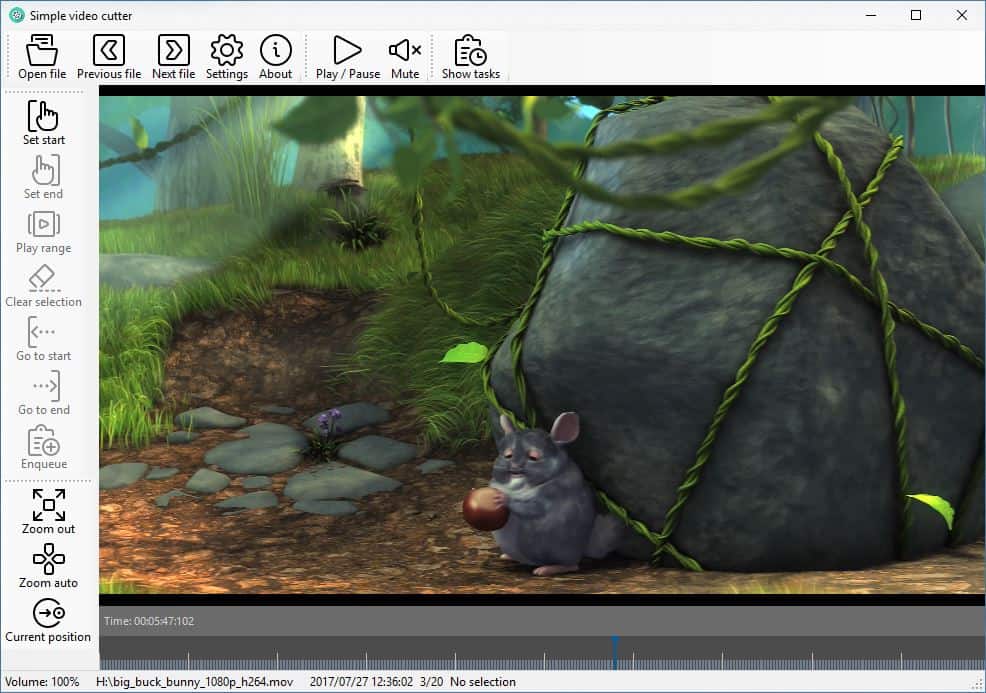
Select a start position in the video using the "Set Start" option from the side-bar. For e.g. let's say you want to edit a video you took on a vacation or at a party, and you find that the first 5 seconds of the video are shaky or that something is blocking the view-finder; place the cursor at a frame after 5 seconds (use the timeline).
This is your starting point, similarly pick an end point. You'll notice the timeline highlights the portion of the video that is selected. You can preview the selected duration using the "Play range" option. Use the clear selection button if you're not happy with your choice and start over. There are absolutely no output settings to tinker with at all, so the program does live up to its name.
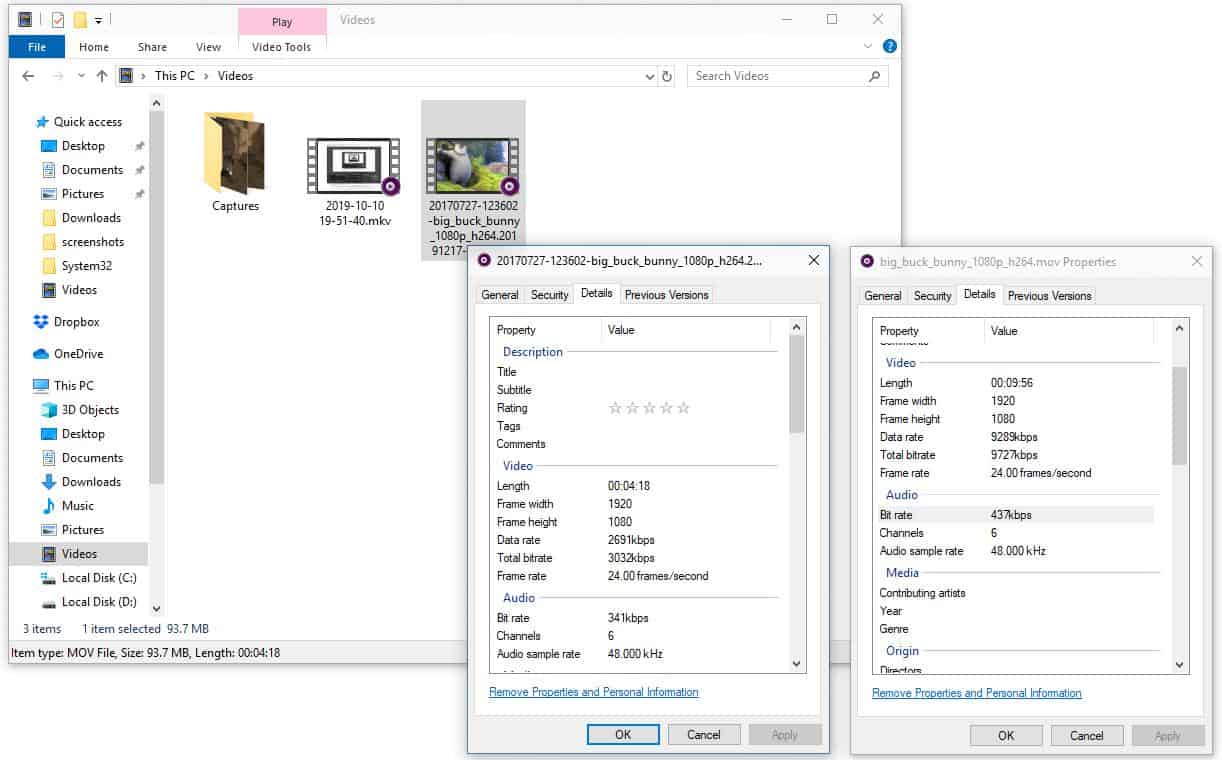
Use the enqueue option and SimpleVideo Cutter will begin the trimming process. You can view the progress in the tasks panel. The process was quite memory intensive, but that also depends on the quality of the video you are working with. The video resolution, frame rate and audio sample rate were preserved accurately. So, it was pretty much a lossless editing/conversion process and it took just a couple of clicks.
Note: If your edited videos end up blurry, it may be because of issues with FFMpeg. I forced the EXE to close, and it resulted in blurry videos. To fix it, I had to re-select FFMpeg's path in the program.
Closing Words
SimpleVideoCutter is a portable program. It's user-friendliness is truly the best feature of the application. I think it can be a good solution for editing videos that you shoot on your phone, and since it retains the quality, you can share the videos online too.
Thank you for being a Ghacks reader. The post SimpleVideoCutter is a free and incredibly easy to use video trimming tool for Windows appeared first on gHacks Technology News.
إرسال تعليق