The Windows Snipping Tool has been the simplest way to capture screenshots thanks to it being one of the tools integrated into Windows. But the editor that it comes with is severely lacking in functionality.

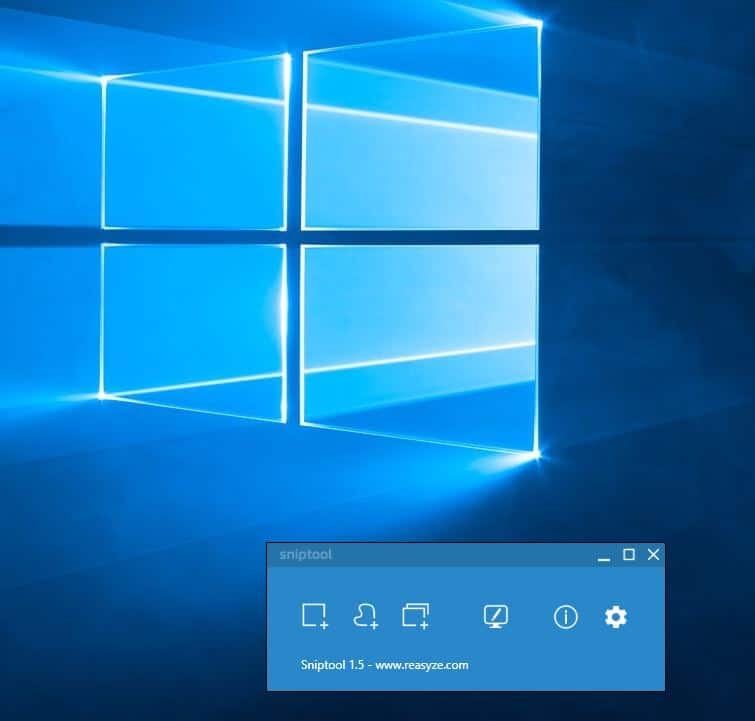
Sniptool is a freeware screen capturing program that comes with a built-in image editor. It is portable, but is also available in an optional installer version. Run the EXE and a small window appears near the system tray; this is a floating panel that you can move around the screen.
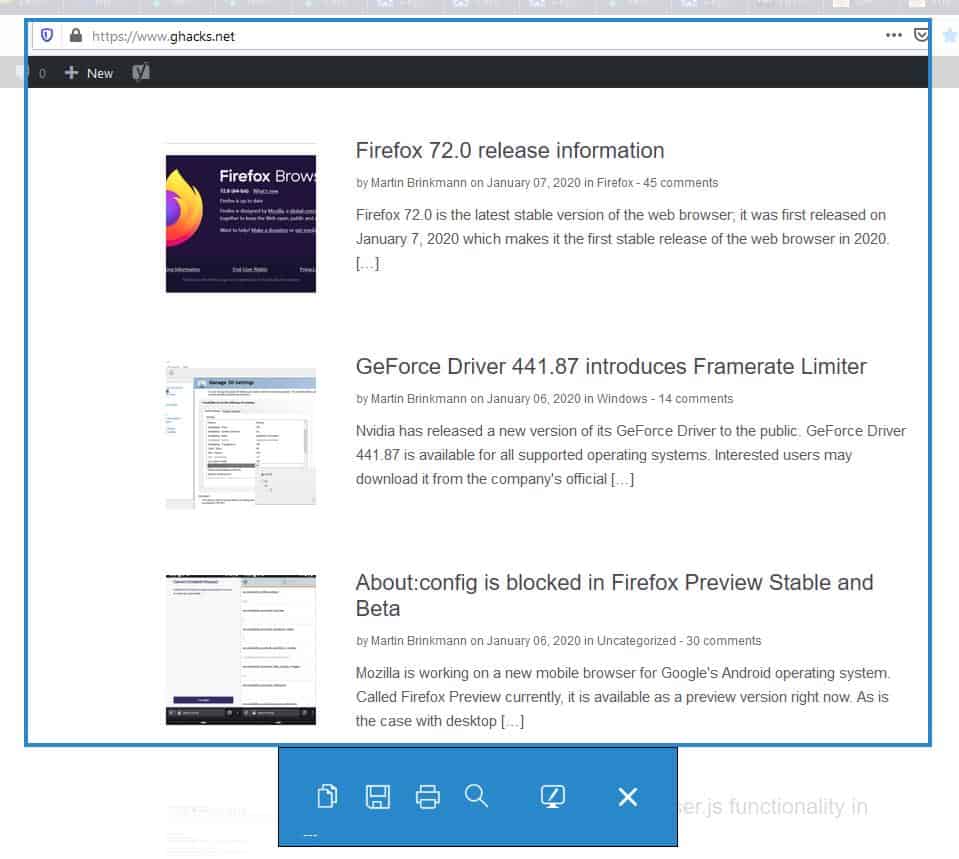
The program supports three screen capturing modes: Region, Freehand, and Window. The Region tool when clicked upon, turns the cursor into a cross-hair. Use it to a draw a box on the screen to capture the content inside it. When the screenshot is captured, a panel appears over the selected area. You can use it to copy the image, save, print, or preview it in your default photo viewer. The Edit button opens Sniptool's built-in editor (explained below).
You can capture custom shaped screenshots using the freehand tool. The Window mode as you may have guessed, takes a screen grab of any application's window. Sniptool can save the images in JPG and PNG formats.
Editor
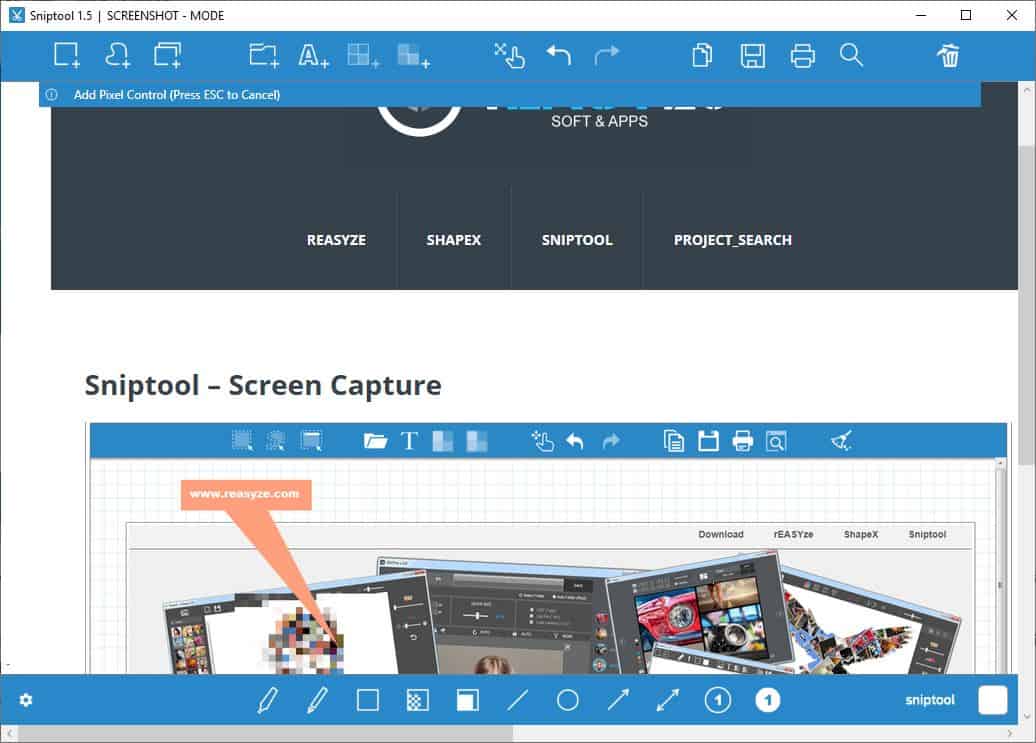
In my opinion, this is Sniptool's highlight. The editor has quite a few options that Snipping Tool doesn't have. The toolbar at the top is home to the text, pixel and blur tools.
The text tool is useful for annotating images and lets you customize the font type, size, color and alignment. The Pixel and Blur tool are handy for redacting personal data in pictures, and you can adjust the pixelation/blurring strength using the slider.

Click on the square in the bottom right corner of the Sniptool editor, to enable a grid/lines background for the canvas. For some reason, Sniptool's editor doesn't support keyboard shortcuts for undo/redo, and having to use the onscreen buttons felt like a chore.
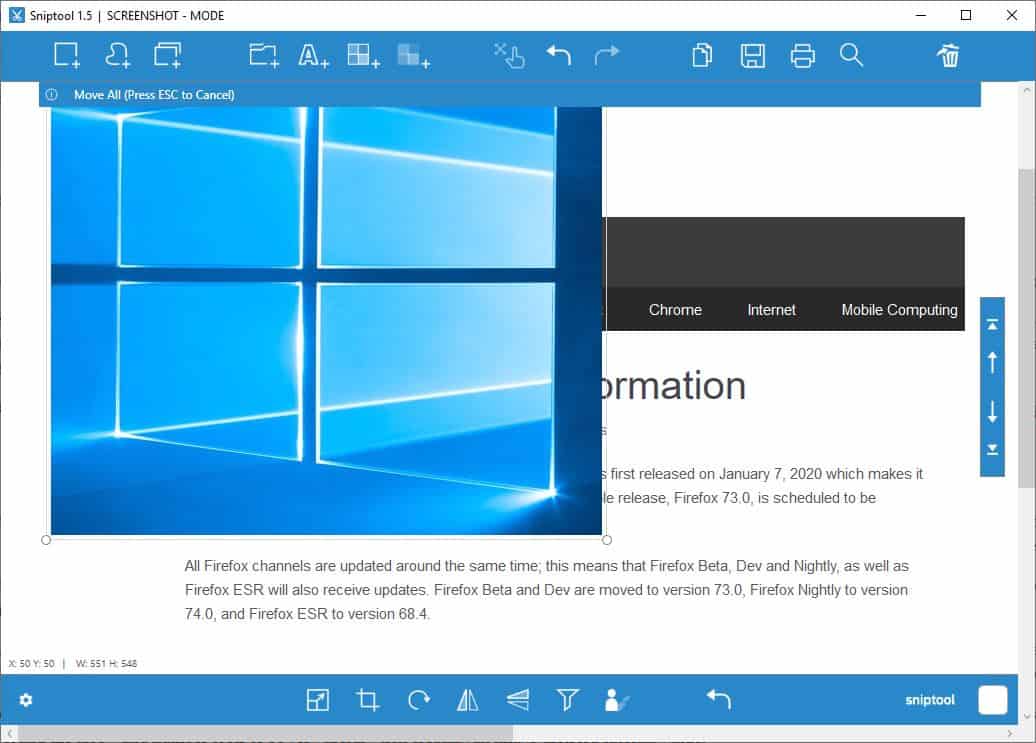
The screen capturing shortcuts in the editor are quite unique because if an image is loaded and you use the tool, the original image stays in the background while the new one is stacked on in it like a layer. You can switch between the images by clicking on them or by using the arrow buttons to the right. If you don't like this method, you can enable the "Single snip" option from the program's settings.

The toolbar at the bottom of the screen has the following drawing tools: Marker, Pen, Rectangle, Transparent rectangle, Filled Rectangle, Line, Ellipse, Arrow, Double-arrow, number buttons and filled number buttons.
I've always found the arrow and number tools to be very useful when creating an image-assisted tutorial/guide.

There is another toolbar, that appears when you click on the displayed image. You can use it to resize, crop, rotate, flip the image. It also has a couple of tools to add a filter or a shadow. The size of the image you're working with is displayed in the bottom left corner of the screen.
The editor isn't exclusive to screenshots you take with Sniptool, you can also use it to open existing images and edit them. The program's settings are quite basic, it has some themes to choose for the panel interface and a magnifier option.
While not as powerful as ShareX (my preferred tool), Sniptool is lightweight, and the editor is delightfully easy to use. My only complaints are regarding the lack of a system tray icon, and support for hotkeys. And if I were to nitpick, I'd say the lack of a timed screenshot is a bit unfortunate.
Thank you for being a Ghacks reader. The post Sniptool is a portable screen capturing tool with a built-in image editor appeared first on gHacks Technology News.
إرسال تعليق