Microsoft Defender Antivirus is the default antivirus solution of Microsoft's Windows 11 operating system. It is turned on by default, unless another security solution is installed that is recognized by the operating system as such. Previously, it was known as Windows Defender.
Most third-party antivirus solutions that support Windows 11 are recognized, but there may be the odd solution that is not.
Most Windows 11 users may want to keep Microsoft Defender Antivirus enabled if no other security solution is installed. Some may want to turn off Microsoft Defender Antivirus temporarily or permanently, even if no other solution is installed. Reasons for wanting to do so include high resource use, Windows Defender Antivirus causing other issues on the system, no requirement for an antivirus solution, e.g., while using a virtual machine image of Windows 11, or simply because of wanting to decide what is running on the computer and what is not.
Enable or Disable Real-Time Protection in Windows 11
Windows Security has options to turn off certain security modules, including Real-Time Protection, in the Settings application.
Real-Time Protection can be turned off temporarily there, while all other protective modules can be turned off permanently.
Sometimes, it may be sufficient to turn of the feature for a short period of time to work around issues that are experienced.
Step 1: Open Windows Security in the Settings application
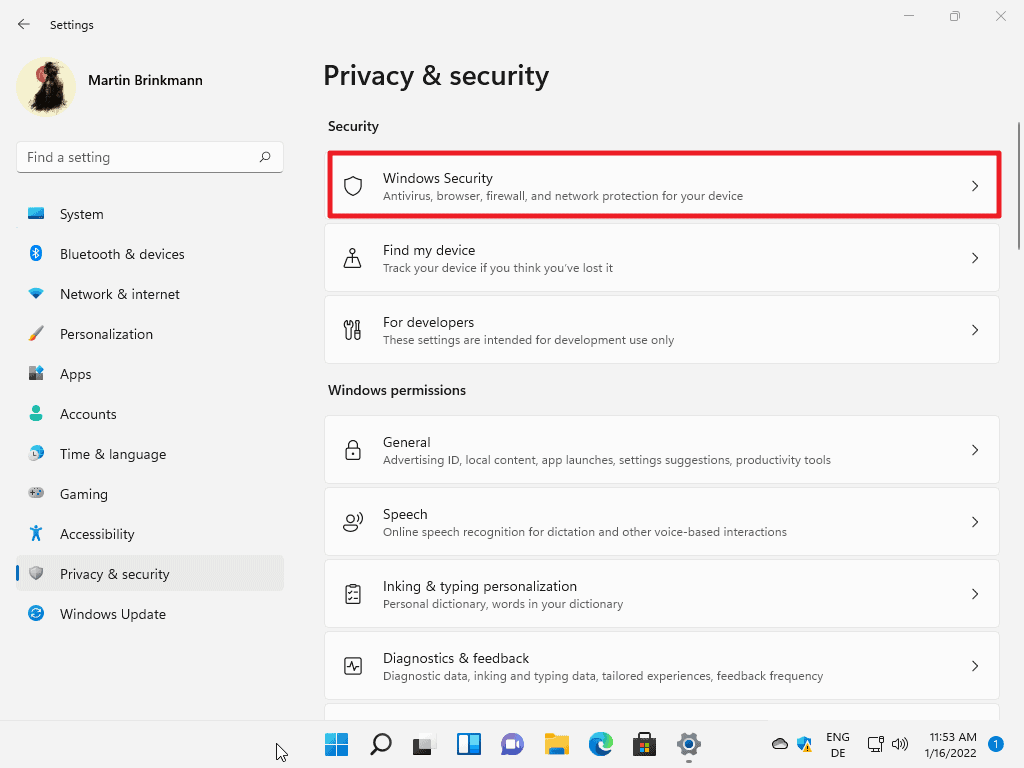
- Select Start and Settings or use the keyboard shortcut Windows -I to open the Settings application.
- Select Privacy & Security from the menu on the left.
- Select Windows Security on the page that opens.
Step 2: Open Virus & Threat Protection
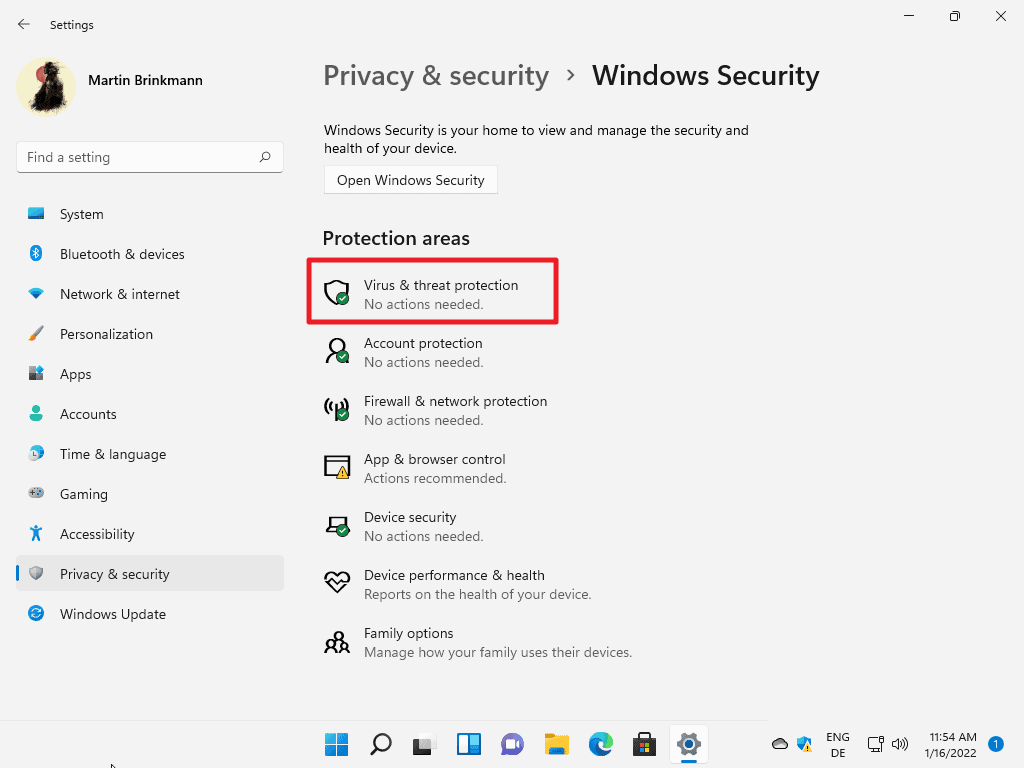
- On the page that opens, select Virus & Threat protection from the list of protection areas.
This opens the Windows Security application.
Step 3: Disable Real-Time Protection
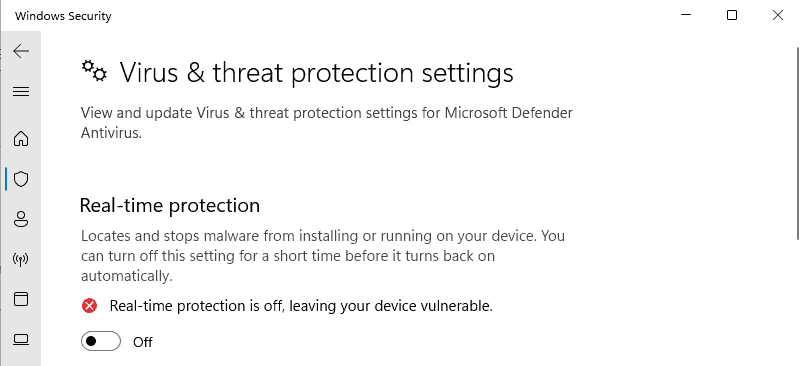
- Select Manage Settings under Virus & threat protection settings on the page that opened.
- Toggle Real-time protection to Off.
- Accept the UAC prompt that is displayed when you make the change.
Microsoft reminds you on the page that the turning off is temporary:
Locates and stops malware from installing or running on your device. You can turn off this setting for a short time before it turns back on automatically.
Tip: you may disable other protective modules such as cloud-delivered protection, automatic sample submission or tamper protection here.
Disable Windows Defender Antivirus using the Group Policy Editor
To disable Windows Defender Antivirus permanently, you need to use the Group Policy Editor or the corresponding Registry setting.
Note that it is necessary to disable the Tamper Protection feature of Windows Security before you make the change. If you don't, Windows Security may turn on Windows Defender Antivirus again.
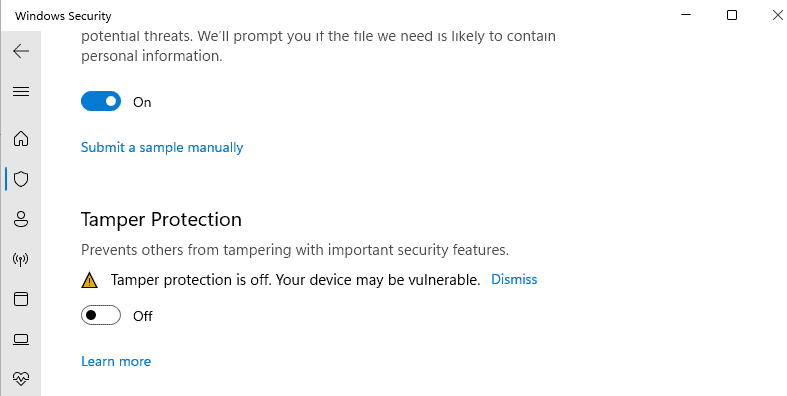
Here is how you do that:
- Select Start and Settings or use the keyboard shortcut Windows -I to open the Settings application.
- Select Privacy & Security from the menu on the left.
- Select Windows Security on the page that opens.
- On the page that opens, select Virus & Threat protection from the list of protection areas.
- Select Manage Settings under Virus & threat protection settings on the page that opened.
- Toggle Tamper Protection to Off on the page.
Disable Microsoft Defender Antivirus using the Group Policy Editor
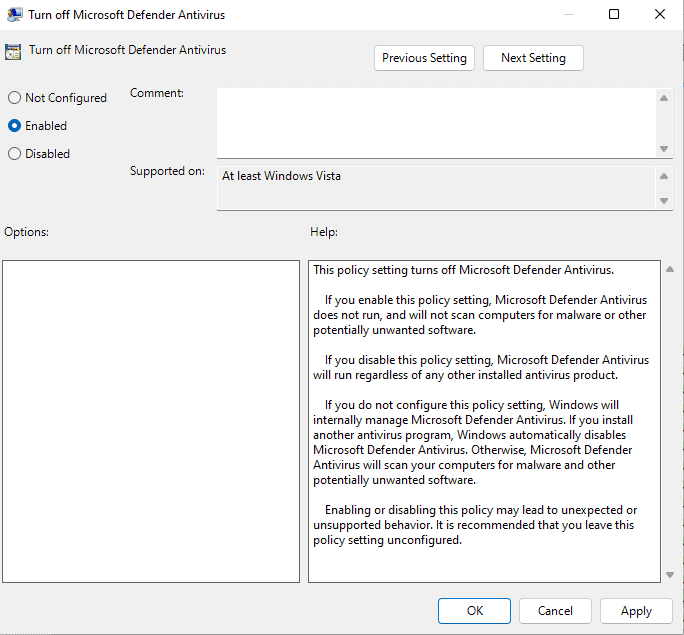
- Select Start, type gpedit.msc and select the result from the list.
- Use the hierarchical structure on the left to go to Computer Configuration > Administrative Templates > Windows Components > Microsoft Defender Antivirus.
- Locate "Turn off Microsoft Defender Antivirus" and double-click on the policy. If you have trouble finding it, click on the "setting" header of the column to sort the list of policies in alphabetical order.
- Switch the state of the policy to Enabled on the page that opens.
- Select apply then ok to save the change.
- Restart Windows 11.
Virus & Threat protection should be off after the restart. Note that you will still see a shield icon in the system tray area as the Shield icon is the Windows Security icon, not the Microsoft Defender Antivirus icon.
Note that the feature was called Windows Defender Antivirus on Windows 10.
Other options
- Use a program such as Defender Control or Configure Defender to manage the state of the program. It is free to use and compatible with Windows 11.
- Try disabling the Windows Defender task in the Task Scheduler library, as suggested here.
Now You: which antivirus solution do you use, if any?
Thank you for being a Ghacks reader. The post How to Disable Microsoft Defender Antivirus in Windows 11 appeared first on gHacks Technology News.
إرسال تعليق